|
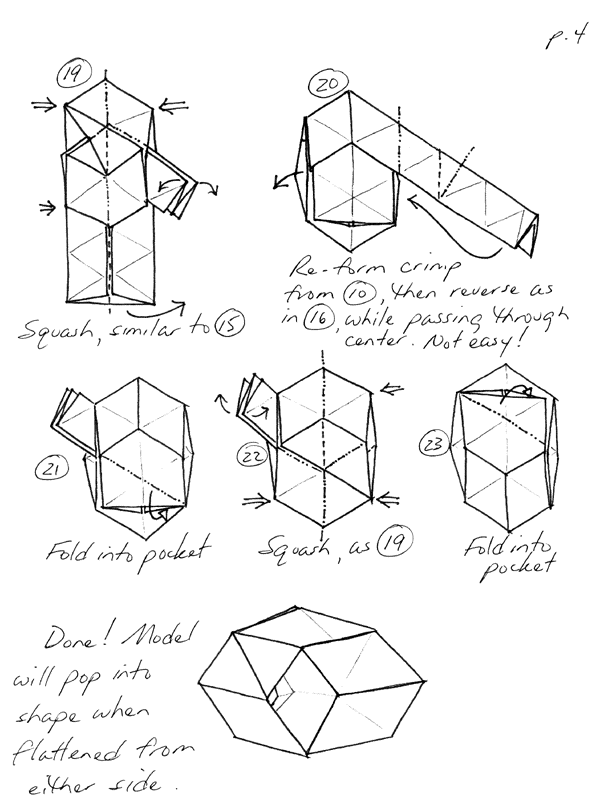
This Addition Explanation to the point
19 of
The Diagram by Scott Cramer
of the Flip - Flop by Thoki Yenn
was made by Russell Sutherland, picture
by Tommy Stevens.
More about step
19 by Alfredo from Madrid
|
Back to FLIPFLOP
|
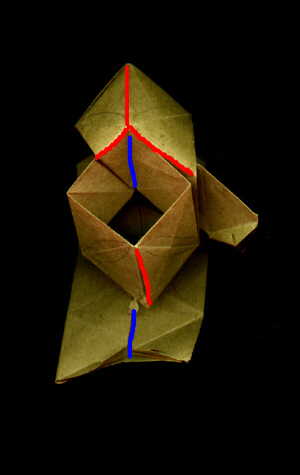
BLUE=
valley RED= mountain The pic was taken in mid-swivel/squash fold.
The cubic portion in the middle part of the model swivels to the
left and tucks in nicely to the overlapping inverted "V" (formed
by squashfolding the bottom layer) while the paper to the right
is spread flat and sandwiched into the "V." Note the places indicated
on the diagrams to push in ... there are 3 points. If done correctly,
the paper "folds itself" when pressing on the indicated areas. **NOTE**
it would be nice to have 5 hands for this maneuver. Once you get
step 19, there is a similar swivel/squash in step 22. I found the
one in 19 to be somewhat more difficult ... had to fiddle with it
quite a while. Good luck ... hope this helps. Russell DARE TO FOLD!!!!!!
|
|