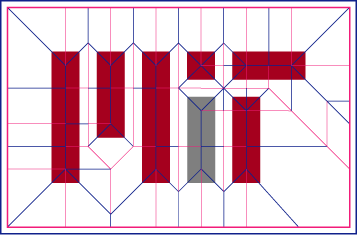
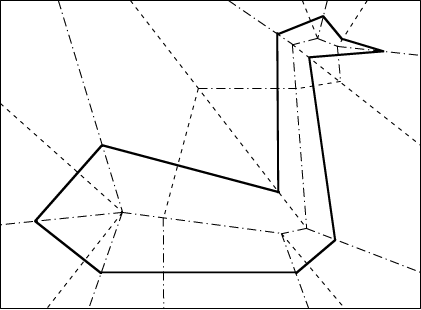
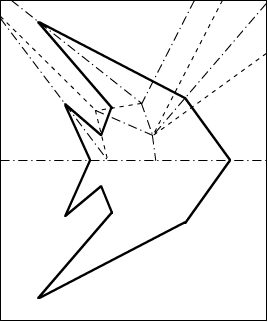
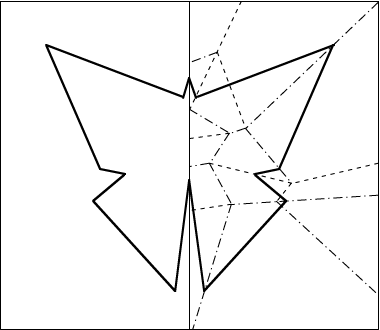
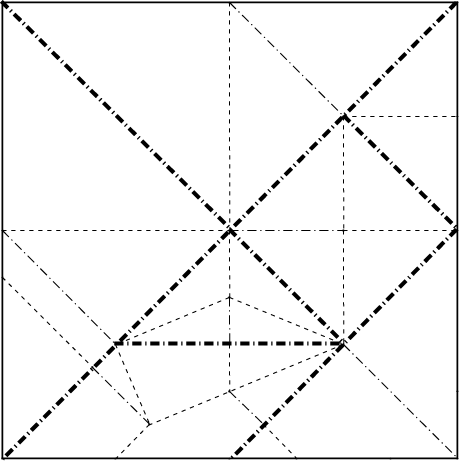
The crease patterns below all have the property that, when folded up,
a single complete straight cut simultaneously cuts all the bold lines
and no more, producing the desired shape or shapes.
For more information, refer to
the fold-and-cut problem and its mathematics.
These examples were designed
using the straight-skeleton method
by Erik Demaine and
Martin Demaine.
[PDF]
[EPS]
[36 dpi image (shown)]
[72 dpi image]
[150 dpi image]
[300 dpi image]
Thanks to Nina Strohminger for finding a good folding of this model.
[PDF]
[EPS]
[72 dpi image (shown)]
[150 dpi image]
[300 dpi image]
[PDF]
[EPS]
[72 dpi image (shown)]
[150 dpi image]
[300 dpi image]
[PDF]
[EPS]
[72 dpi image (shown)]
[150 dpi image]
[300 dpi image]

[PDF]
[EPS]
[72 dpi image (shown)]
[150 dpi image]
[300 dpi image]
Based on a design by magician Gerald Loe in his book “Paper Capers” (1955).
G4G5 (prepared for the 5th Gathering for Martin Gardner)

[PDF]
[EPS]
[72 dpi image (shown)]
[150 dpi image]
[300 dpi image]
Jackolantern (make out of orange paper!)

[PDF]
[EPS]
[72 dpi image (shown)]
[150 dpi image]
[300 dpi image]
[PDF]
[EPS]
[72 dpi image (shown)]
[150 dpi image]
[300 dpi image]
How To Print
- The best way to print is to open the PDF version,
e.g., in Adobe Acrobat Reader.
- For easiest folding, print scaled to fit the piece of paper,
and rotate to maximize scale.
- If PDF doesn't work for you, print from one of the images. 72 dpi
ought to work without scaling, but higher dpi will be higher quality.
- You may get better results printing an image if you save it to a file,
open it, and print it.
How To Fold
To fold one of these examples, we recommend the following procedure:
- Print the crease pattern as large as possible, and possibly also
photo-enlarge using a photocopier onto larger paper.
- If your example has a central line of symmetry, fold along that first.
- Precrease all the creases (dashed and dot-dashed lines) by pinching
the paper and ensuring that you follow along the printed lines,
naturally forming a mountain crease.
(This may get your hands a little dirty with toner.)
- Reverse the valley (dashed) creases, so that all crease have their
proper orientation.
- Now the hard part: collapse all the creases simultaneously.
This can take some practice, especially on the harder examples,
but with some effort you should be able to get it.
- Finally, cut along the bold line.