To better capture and share our knowledge and professors, we think many university classes—especially rare/unique/experimental classes—should be video recorded and distributed freely online. Today, not many classes are online, but the number is growing. For example, here are some statistics from MIT's OpenCourseWare (OCW):
| EECS | MIT | |
|---|---|---|
| Classes on OCW | 212 | 2,678 |
| … with some video or audio | 18 | 124 |
| … with complete video lectures | 11 | 53 |
| [as of December 2011, according to this Python script] | ||
This webpage documents one “do-it-yourself” approach to recording video lectures, which is fairly cheap (under $3,000 for everything but a computer) and scalable (under an hour of extra work per lecture). The main overhead is the requirement an experienced camera operator.
We use the following equipment:
| Category | Model | Price (2011) | |
|---|---|---|---|
|
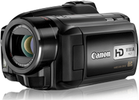
| video camera | Canon VIXIA HG21 | ~$1,000 |
|
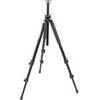
| tripod base | Manfrotto 055XPROB Aluminum Tripod Legs. | ~$180 |
|
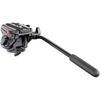
| tripod head | Manfrotto 701HDV Pro Fluid Video Mini Head | ~$140 |
|
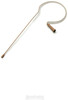
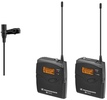
| microphone | Countryman IsoMax E6 EarSet Microphone | ~$400 |
|
| wireless mic system | Sennheiser EW 112-p G3 | ~$600 |
| Total: | ~$2,320 | ||
Camera. Any decent Canon VIXIA should do. My model (HG21) is no longer available, and today we would get a higher-end model (e.g., HF G10) which seems to have a better lens. Do not use a low-end point-and-shoot or ultraportable video camera, as they tend to have noisier sensors. You might as well get an HD camera (ideally 1080p), for higher quality and in case you need to digitally zoom later.
Tripod. Other than getting a base that supports the weight of your camera (easy for a small camera like a VIXIA) and won't bounce around in the lecture room, the main investment here is the tripod head. Fluid video heads are a must for smooth pans. The one we use is OK, but not great—we would like a better one.
Microphone. One of the most important ingredients is the microphone. If the audio sounds good, the viewer will tend to overlook video flaws; and if it sounds bad, they will tend to tune out. Invest in a high-end microphone, either head-mounted like the Countryman we use (which takes a little getting used to, but sounds great) or lapel/lavalier (which are more common and still sound good, provided you mount them correctly and don't scratch them). The Sennheiser wireless system actually comes with a lapel, so you could skip the Countryman. Never use the on-camera microphone.
Wireless mic system. This is the part that connects your mic to the camera. You need a transmitter that can attach to your microphone; for example, there is a special Countryman microphone that screws into a Sennheiser transmitter, to prevent disconnection. You need a receiver that can plug into your camera, so make sure that your camera can take a mic input (some do not) and your receiver has the same plug (typically 3.5mm stereo jack on low-end equipment). Transmitters and receivers generally come in pairs and only talk to each other. We chose the portable system so that we can mount the receiver to the camera, but keep in mind that this means more batteries (four AAs every few lectures). You also need to choose the wireless band, to minimize conflicts in your area. We'd suggest calling Sweetwater, who are very helpful.
Planning. For every new lecture room, you'll need to spend an hour or so in the room to try out different camera positions and angles, ideally without moving around too much furniture. Generally it is easier to operate a camera from several rows back from the lecturer (in small rooms, the very back of the room). You also generally want the camera to be high, to avoid capturing the heads of sitting students, but not so high that the camera operator can't see what s/he is doing. Elevated classrooms (with higher seats in back) are ideal. Shoot from the middle of the room (not left or right) if possible. You should also practice setting up the equipment quickly. The first time you use the wireless transmitter, you also need to set its volume to a reasonable level.
Warning students. For legal purposes, you need to post a sign (at least during the first lecture or two) stating that you are video recording and if students do not want their person to appear in video, they should stay clear of the camera. A somewhat MIT-specific example is available as text or Word; revise as necessary. We also usually send an email announcement to students in the class, before the first lecture (for whomever's signed up) and after (for late signups). Then, at lecture, you should identify what areas are safe from the camera (ideally all seats).
Carrying equipment. The equipment above is pretty heavy and bulky, especially the tripod. We have a tripod carrying case, which also fits the microphone, and put the remaining equipment in a small camcorder bag. Obviously you need to assign someone (typically your camera operator) to carry this to every lecture.
Setting up. It takes at least 5 minutes to set up, and closer to 10 if you're out of practice, so get to class early. The camera operator needs to unfold and place the tripod; attach the camera to the tripod; attach the wireless receiver to the camera (we use Velcro); plug the wireless receiver into the camera mic input; turn on the wireless receiver; and check the battery level. We also Velcro the camera's remote control to the tripod handle, to make it easy to zoom while panning. The lecturer needs to wear the microphone; plug the microphone into the transmitter; turn on the transmitter; and check the battery level. We typically replace the batteries when they hit 2 out of 3 bars (80 minutes is a long time), but you could probably wait till 1 out of 3 bars (the readings go down to 0 bars on the Sennheiser). The camera operator needs to check that the audio is coming through correctly (ideally plugging in headphones and listening). All of this work except the final tripod placement can be done outside the lecture room, which is helpful when there's a class before you; though you'll still want to get into the lecture room as soon as you can. Inside the room, you should maximize indoor lighting (especially board lights), close window shades (to make white balance consistent), and if necessary, re-arrange usable tables/desks/chairs to be out of camera range.
Camera work. This is perhaps the bottleneck of the do-it-yourself approach. The camera operator needs a fair amount of experience, attention, and a good eye to do a good job at panning, tilting, and zooming. Learn to frame well; keep the lecturer in view most of the time; establish shots of boards; pan deliberately, smoothly, and quickly; watch for the lecturer pointing; etc. All this needs to be done while watching the lecture through the small LCD viewfinder. Camera work is harder than we originally thought. Watch your videos to learn how to be better. In addition, some schools (such as MIT) have strong privacy policies preventing you from publishing the image of students in class (without permission), so you need to avoid shooting students in an identifiable manner.
Lecturing. Our setup does not capture audience sound, so the lecturer needs to (remember to) repeat student questions before answering. [We have not experimented, but believe capturing audience sound with high fidelity is difficult; you would need a different sort of microphone and either a portable audio recorder (for offline editing, which will be tedious), or another wireless system and a mixer (for live editing, which will require a very attentive audio engineer / camera operator).]
Slides. Projected slides (e.g., PowerPoint) tend to look pretty bad (low contrast) on video, as far as we've been able to achieve. Use the blackboard when you can, and provide another high-quality copy of your slides (e.g., PDF) for viewers to flip through. If you use PowerPoint in your lectures, you may want to install the free plugin Microsoft Producer, which (if you click the special slide-show button) will record the time of each slide advance/retreat, save it with the presentation file, and later you can extract it to a text file. Another constraint is copyright: now that your slides will be visible to the world, you can only use images that you have the rights to use, from either ownership (that you didn't transfer), Creative Commons, fair use (which is unfortunately rather vague), or in the case of MIT, the MIT Faculty Open Access Policy (which lets faculty use most of what they publish, except books).
Transfer. We currently record to the camera's internal storage (HDD), but would recommend recording to flash if possible, so that you can dump it onto your computer with a fast card reader instead of USB 2.0 (which takes ~20 minutes for an 80-minute lecture). Just make sure you won't run out of room. Your computer (and backup system) is also going to need a lot of disk space: each 80-minute lecture is about 15GB at a 28Mbps bitrate.
Editing. We try to do just two edits for each lecture: (1) set the in and out points for the video (trimming excess beginning/end), and (2) add a title frame (with the class name, lecturer, lecture number, and lecture title) and a cross fade from that to the video. Try to give and record lectures so that they don't need any other editing, or else this will be a major time sink. For software, we use Adobe Premiere CS5, which works with H.264 video natively and supports GPU acceleration. Although a weak computer will do, you'll have a much happier time with lots of RAM (24GB is cheap these days), fast drives (SSD and/or big RAID), a high-end nVIDIA video card (e.g., GTX480 or GTX580), and multiple cores (we use 6). We draw the title frame using Adobe Illustrator (using the Video and Film / HDV 1080 preset, and exporting to PNG at 72dpi), but there are a ton of options to do this, including Premiere itself.
Encoding. We encode two versions of every lecture: for streaming or fast download, a 360p version (640×360, 30fps, H.264 codec, Baseline profile, VBR 1-pass, target bitrate 0.5Mbps, maximum bitrate 1Mbps, AAC audio, 64kbps); and for higher-quality download, a 720p version (1280×720, 30fps, H.264 codec, Baseline profile, VBR 1-pass, target bitrate 1Mbps, maximum bitrate 2Mbps, AAC audio, 64kbps). These settings seem to work well for us (blackboard lectures), but your mileage may vary. The first time you work with encoding, look for ugly artifacts in the output. Encoding can take a very long time: on a 4-core Xeon with only 3GB RAM (32-bit Windows) and a regular 5400rpm disk, we needed about 6 hours to encode 80 minutes. On a 6-core Core i7 with 24GB RAM and an 8-way RAID6, though, we can do it in around 30 minutes.
Posting. Put the encoded videos on the web and link to them. Erik wrote custom software for web video playback in HTML5 or Flash, with synchronized slides and lecture notes. (See the examples below.) We'll be releasing the software soon; if you're interested, let us know.
Student projects. Some schools, such as MIT with its Student Information Policy, prevent student project presentations from being made public without the student's permission. We also worry that students would feel additional pressure if being recorded (especially having to wear a microphone), so have never done so.